So I know how painful it is for you ladies to accidentally break your nails. They ruin your perfect new polish, get stuck to your sweater, rip your expensive new pair of tights, and there is nothing more tormenting than having to cut off your newly polished and evenly filed babies.
But don't worry darlings, I understand. Make yourself a cup of tea, and let me help you fix this!
TEABAG SURGERY!
for the broken nail

You'll need:
- an empty tea bag
- a pair of scissor
- nail glue
- base/top coat
- nail file/buffer
- a cotton bud
- a pair of tweezer
Follow these steps:
Step 1: Get rid of the oil

- Clean your nails
- Apply a layer of base coat or top coat onto your broken nails to remove the excess oil and help the tea bag stick to your nail better.
Step 2: Glue it together

- Apply a bit of nail glue onto the crack and wait for a few seconds before apply nail glue to the rest of your nail.
*only apply a very thin layer onto the nail because too much glue can cause the teabag to move around, and not too close to your skin and cuticles or else you might end up having the teabag glued to your skin and it can be painful to peel off.
Step 3: Teabag surgery!

- Empty a tea bag and cut out a piece slightly smaller than the side of your nail and quickly apply it onto your nail using a pair of tweezer before the glue dries out.
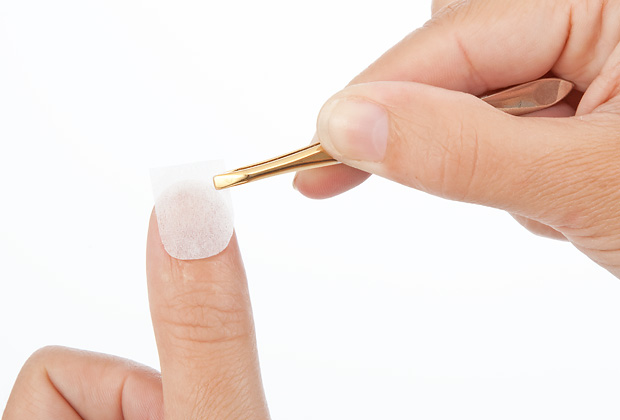
*don't use your hand, it can be a real pain in the ass trying to move the teabag to the right place using your fingers.
Step 4: Post-surgery treatment

- Using a cotton bud, light press the teabag to your nail so it won't move around and appear much smoother. You can use your finger in this step if your hands are as steady as a surgeon!
Step 5: And more glue!
- Apply another layer of nail glue onto the teabag after it has fully stuck onto your nail and wait for it to dry.
*don't think that this step is unnecessary and such a waste of glue. It helps give the teabag a smooth and transparent look, just like your nails. You will definitely need this extra layer of glue before your start buffing your nails if you don't want to buff away your little teabag.
Step 6: Buff away !

- Now your "once" broken nail is as good as new and may even look stronger than the others. Use your buffer to lightly buff the surface of your nail to make it more even and shiny. Apply nail polish of your choice and voila!
*don't get carried away and buff too much, you may buff away your teabag as well!

*Comment below if you want me to do a tutorial for this nail art
Hope this helps!


Very nice post.^^
ReplyDeleteThanks sweetheart x
ReplyDeleteThis is such a great tip! I saw something similar last week but it wasn't such detailed, thank you!!
ReplyDelete-V
http://stylishlyme.com/
Aw, thanks for reading my post x Please follow and I will certainly write many more helpful tips x
ReplyDelete